When we are holistically following DevOps and Automation techniques in our project then we come at the stage where our automation test case become so huge in number that ultimately it requires distribution of test cases to make the execution faster and efficient. In this case, the Selenium grid is the best solution to distribute the test cases on different systems and environment as per the requirement. You must have heard about the Selenium grid as it is one of the parts of the Selenium suit. It has major significance in our project lifecycle with respect to automation.
Recommended: WebDriver Event Listener for Effecting logging and Reporting
What is Selenium Grid?
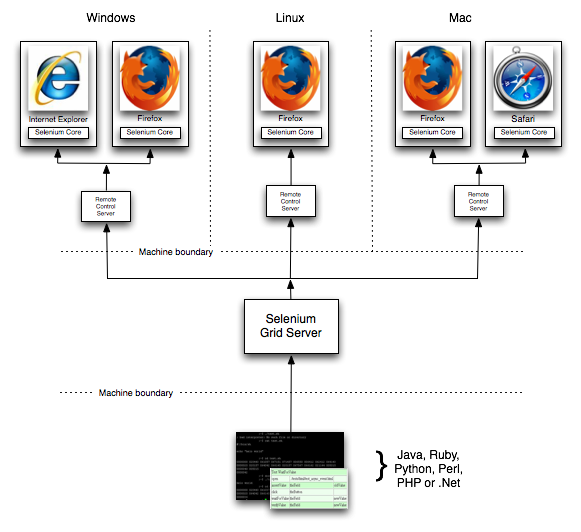
Selenium grid is one of the most important members of the Selenium family which is composed of Selenium IDE, Selenium RC, Selenium WebDriver and last Selenium Grid itself. It helps to simplify the test execution by distributing the tests parallel across different environments like browser, operating system, and machines. These machines are configured based on their IP address.
Your code will be stored at one main system and you will be able to execute same code to the different system with the help of Grid, hence, you do not need to keep codes in the distributed system. One system will command the other systems.
What are the significances of using Selenium Grid in the Test Automation project
Some of the significances are as follows:
- Easy to distribute test on different machines, OS and browsers
- Parallel execution in different machines
- Tine saving process when a good number of test cases
- Easy to implement with CI tools
What are the components of Selenium Grid?
Selenium Grid mainly consists of two components, Hub and Nodes.
The Hub
- Hub is the central server
- It is responsible to distribute test codes in node systems
- In a Selenium grid, Hub will be only one
The Nodes
- Nodes are the distributed systems
- Nodes are different machines with different Operating systems and browsers
- Nodes must be registered with the hub
- Nodes get instructions from the hub then test execution takes place
How to set up Selenium Grid with command line?
Let’s proceed to configure Selenium grid with the command line.
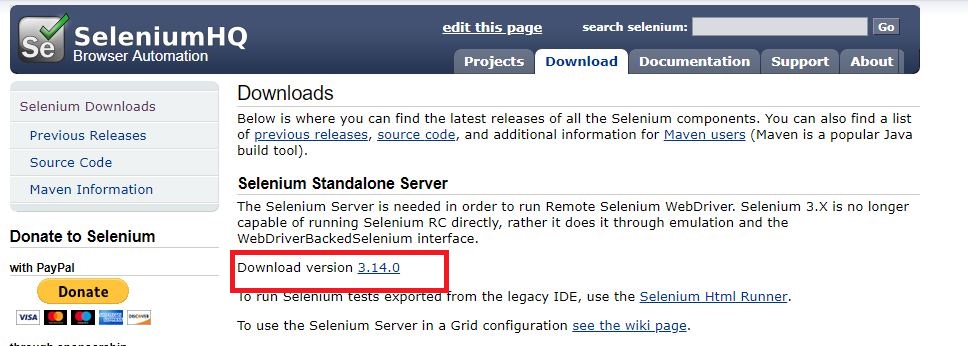
Step# 1: Download Selenium Standalone Server jar file
Click here to download Selenium Standalone Server jar file and store in the appropriate folder in your local drive.
Step# 2: Configure Hub
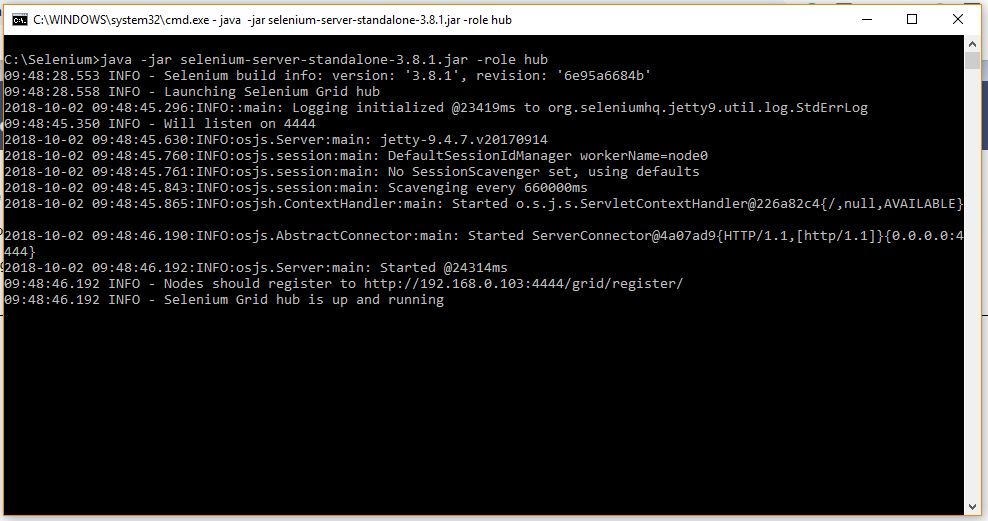
Now we are going to first configure the hub. Therefore, open a command prompt in your system. Navigate to the directory where you have saved Selenium Standalone Server jar file. Once you are in the server directory then type the below command:
java -jar selenium-server-standalone-3.8.1.jar – role hub
Hub starts turning up. You get below message in command prompt.
Step# 3: Verify whether the hub is up and running
Hub is your local system. So you can either navigate to http://localhost:4444 or http://yourIPAddress:4444
You see below the Selenium Grid Hub Homepage.

Further, click on Console.

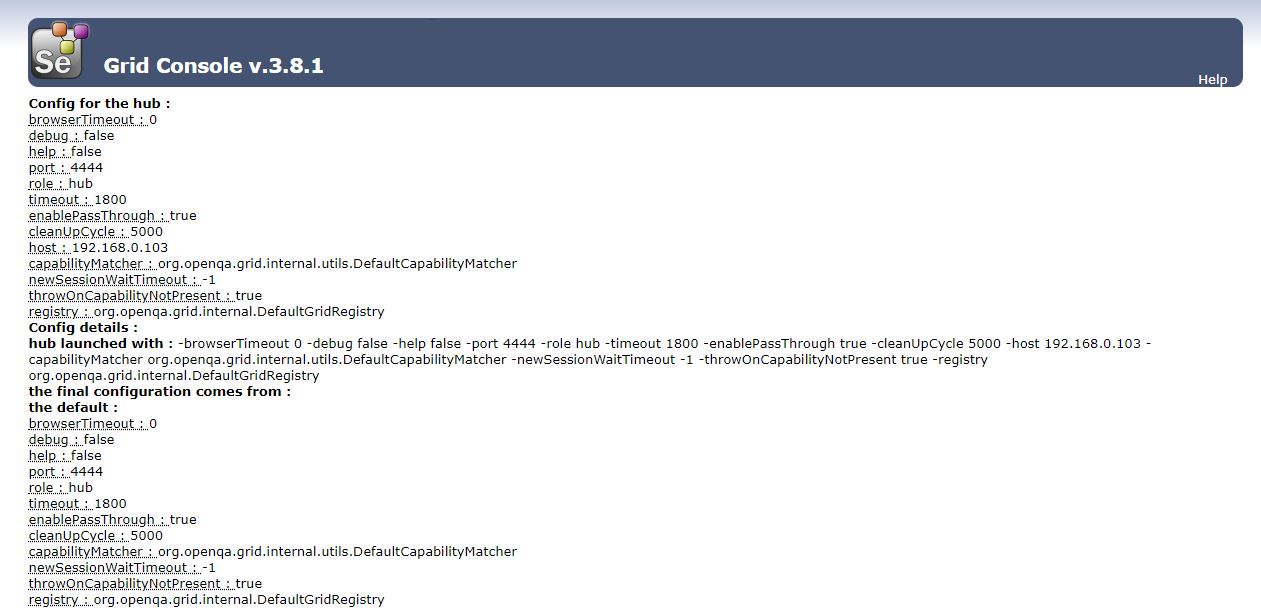
Then click on View config. When you click on view config then you see the hub configuration.
Step# 4: Configure Node
You need to configure the node from the node system itself. So, go to the node system and open command prompt. Navigate to the Selenium Standalone Server directory then type the following command.
java -jar selenium-server-standalone-3.8.1.jar – role node -hub http://ipAddressOfHub:4444/grid/register -port 5566
This command will register grid to the hub.
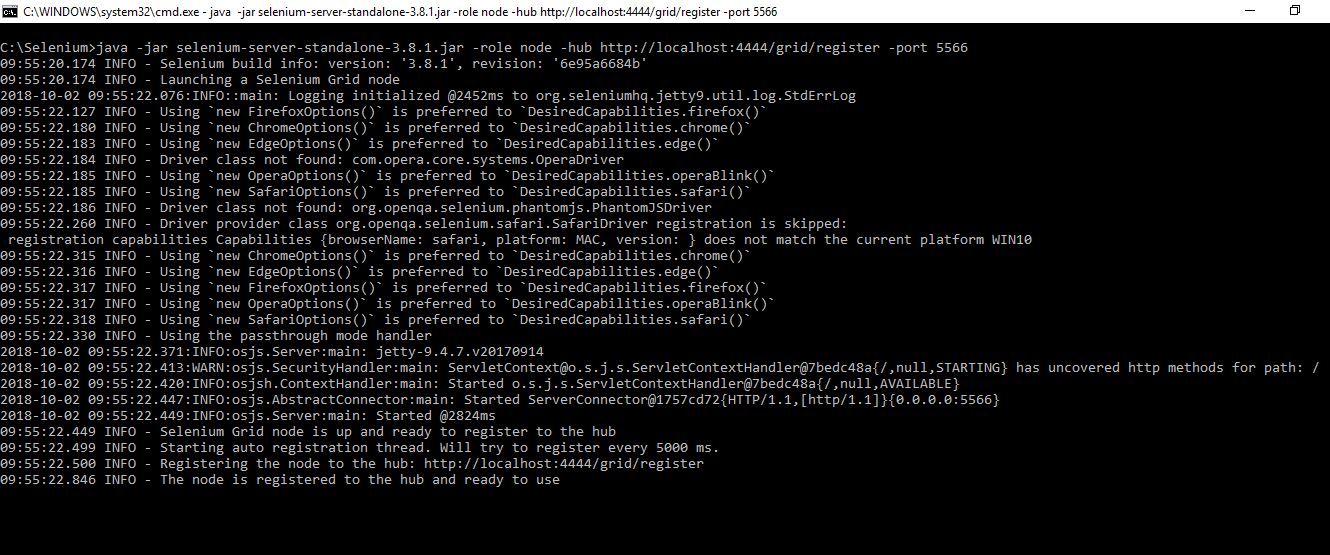
Step# 5: Navigate to Node console
Now you can validate node console by navigating to the address- http://nodeIPAddress:5566
The node initially offers 5 Mozilla Firefox, 5 Google Chroma, and 1 IE as the default browser.
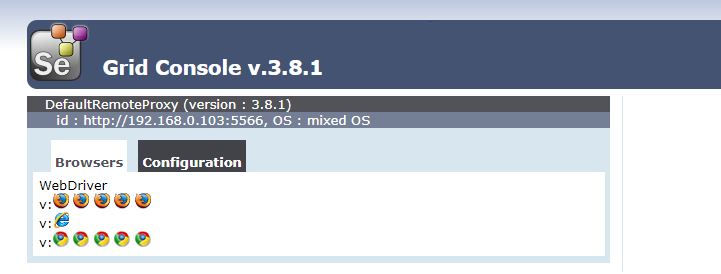
You can view node config too.
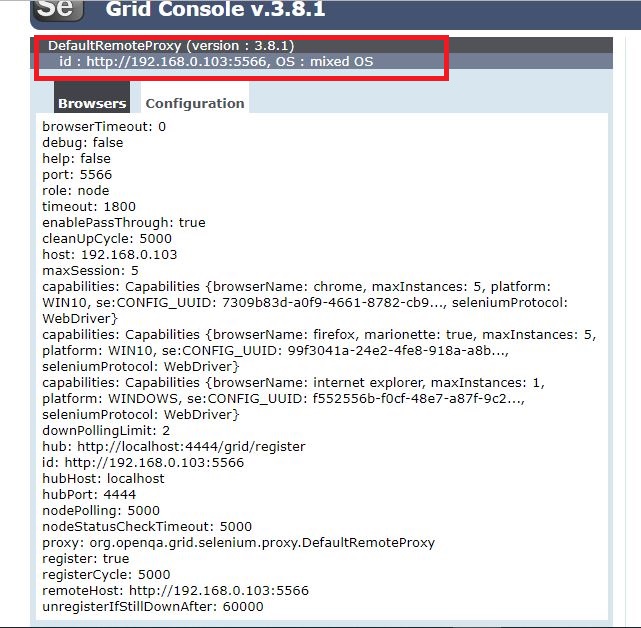
By doing so you successfully configure hub and nodes of the Selenium Grid.
How to design Selenium test cases to run on Selenium Grid?
After configuration, next, we need to design test cases.
Note: Earlier Selenium Grid was using DesiredCapabilities, but after the introduction of various options like ChromeOptions, FirefoxOptions, etc, Selenium Grid suggests using these options over DesiredCapabilities.
Definition of ChromeOptions to work on Chrome browser in Selenium Grid with DesiredCapabilities
You can get platform and browser details from the Grid console by hovering the mouse over the browser’s icon. Here is the sample code:
          ChromeOptions options = new ChromeOptions();
	  options.addArguments("--start-maximized");
	  options.setCapability(ChromeOptions.CAPABILITY, options);
	  options.setCapability("browserName", "chrome");
	  options.setCapability("acceptSslCerts", "true");
	  options.setCapability("javascriptEnabled", "true");
	  DesiredCapabilities cap = DesiredCapabilities.chrome();
	  options.merge(cap);
Creating an instance of RemoteWebDriver
Here we will use RemoteWebDriver, instead of ChromeDriver, since we are distributing the test to the remote devices. So, the definition will be like-
WebDriver driver = new RemoteWebDriver(new URL(nodeUrl), options);
Sample program to run the test case on Selenium Grid
package com.inviul.selenium.project;

import java.net.MalformedURLException;
import java.net.URL;

import org.openqa.selenium.Platform;
import org.openqa.selenium.WebDriver;
import org.openqa.selenium.chrome.ChromeOptions;
import org.openqa.selenium.remote.DesiredCapabilities;
import org.openqa.selenium.remote.RemoteWebDriver;
import org.testng.annotations.Test;

public class GridImplementation {
  @Test
  public void gridImplementation() throws MalformedURLException {

	  System.setProperty("webdriver.chrome.driver", "C:\\Selenium\\chromedriver.exe");

	  String appUrl = "https://www.inviul.com";
	  String nodeUrl = "http://192.168.0.103:5566/wd/hub";


	  ChromeOptions options = new ChromeOptions();
	  options.addArguments("--start-maximized");
	  options.setCapability(ChromeOptions.CAPABILITY, options);
	  options.setCapability("browserName", "chrome");
	  options.setCapability("acceptSslCerts", "true");
	  options.setCapability("javascriptEnabled", "true");
	  DesiredCapabilities cap = DesiredCapabilities.chrome();
	  options.merge(cap);


	  WebDriver driver = new RemoteWebDriver(new URL(nodeUrl), options);

	  driver.get(appUrl);

	  System.out.println("Title is- "+driver.getTitle());

	  driver.close();
	  driver.quit();
  }
}
You can check the similar execution log in the node command prompt. See image below-
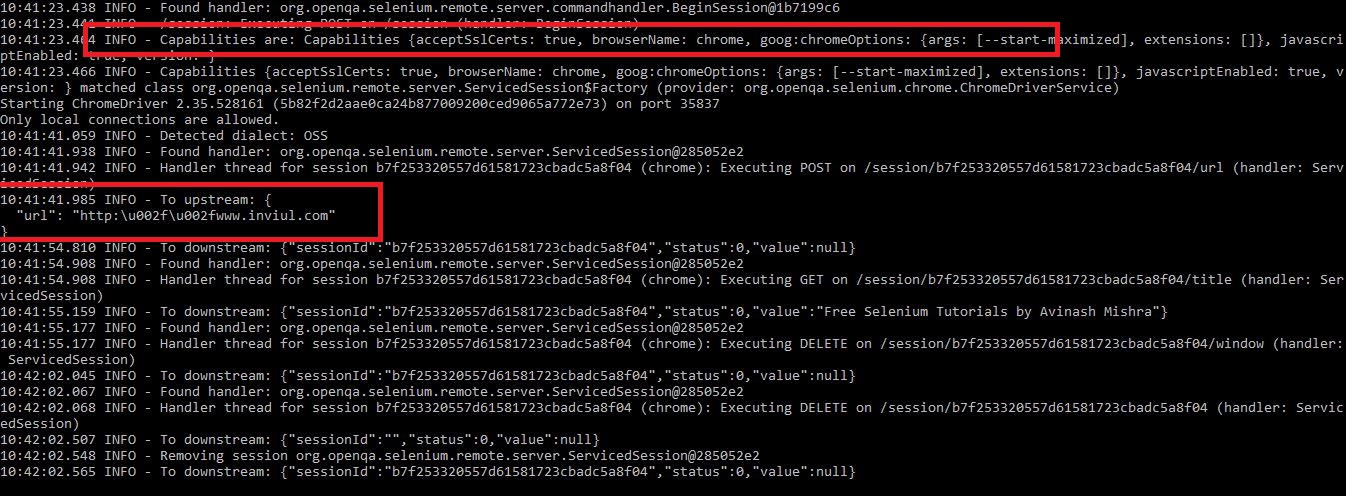
After successful execution-

This was all about implementation of Selenium Grid with the command line. If you have any queries, feel free to write in the comment below. Meanwhile, You can join our Facebook groups too for more update.


