Continuous Integration is on trend so is the DevOps. You would have mastery over Selenium WebDriver or Automation Framework development, but all your knowledge is incomplete without the knowledge of the DevOps or Continous Integration. It has an added benefit to your knowledge. Today not only testing processes are in automation, rather the entire lifecycle automated and it became possible when Development, Operations and other Stakeholders came under the same umbrella which we call as DevOps. Basically, we connect other tech environments with the help of pipeline and the status of the pipeline tracked and triggered through the build. Continuous integration tool generated these builds. There are some paid and free tools available. Some of the tools are- Jenkins, Bamboo, Team City, etc.
Jenkins, the most popularly used CI tool. Today we are going to discuss this wonderful tool and its configuration with your Maven project. We will also see how builds are triggered automatically when we run our test in Eclipse and Test results validation after doing the manual run of the build in Jenkins.
Recommended: Log4j Logging Configuration in Selenium Automation Framework
What is Jenkins?
Jenkins is a CI (Continuous Integration) tool which is written in Java. This is a Hudson project which is basically an open source. It offers services like Continuous delivery and Integration.
We can use on Windows, Linux, Mac OS etc environment.
Now one question comes in our mind that why we use Jenkins in selenium.
The answer is if the software changes or deployed in a new environment Jenkins is able to run test scripts every time to ensure whether the code is the break or not. That’s why Jenkins is called continuous integration tool. We can also schedule our test script at the specific time and it generates the test report as well.
How to download and configure the Jenkins?
Step# 1: Click here to download the installation file for your Operating system.
Step# 2: Install Jenkins. If you are using windows OS then download for windows
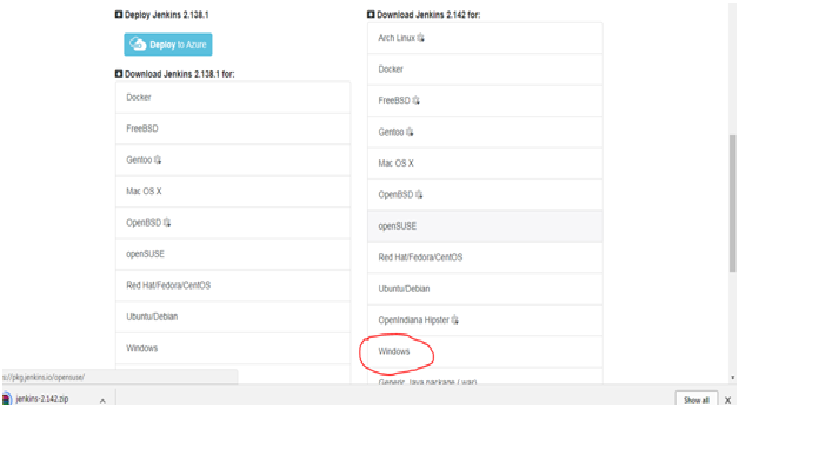
Step# 3: Unzip Jenkins to the specified folder and continue to install.

Step# 4: Click on next
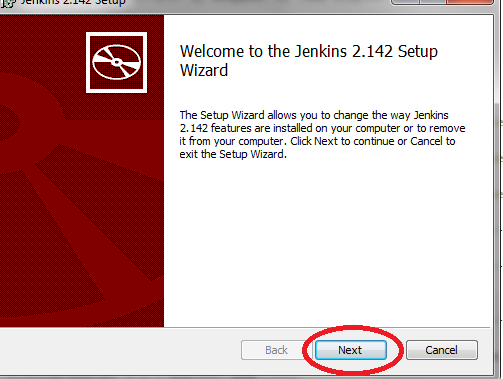
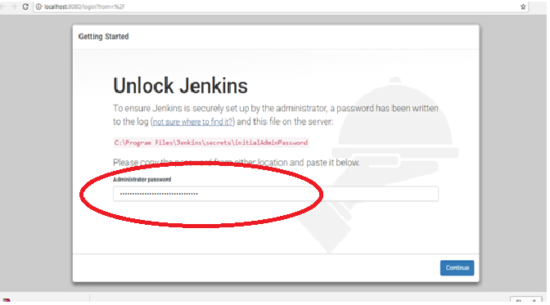
Click on Install to complete the installation process. The following page appears after the completion of the installation.
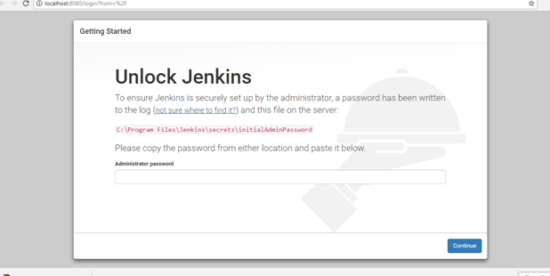
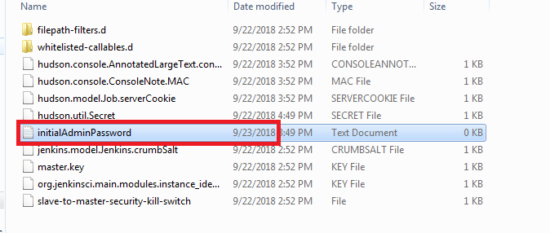
Now go to the below directory in your system and copy the password from the red circle file.
C:\Program Files\Jenkins\secrets
Now paste the copied password into the Administration password’s field then continue.
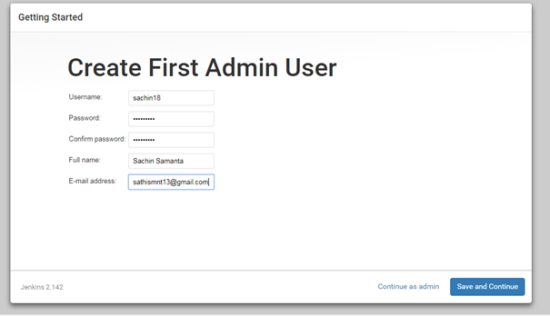
From here you must reset your username and password.
Click on Save and Continue.
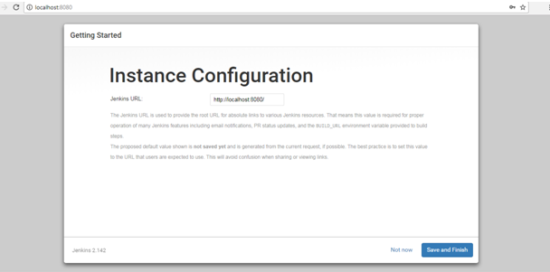
Now you will be redirected to Jenkins home page. You can now create a new job.
How to create the Maven project in Jenkins?
Click on New Item to create the job then select the maven project from the options. Follow these steps:
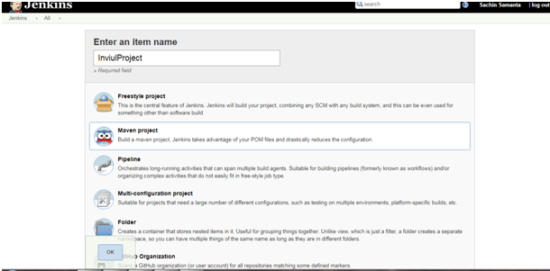
Click on Ok
If, in case, you are not getting Maven project option then you need to download maven plugin from manage Jenkins option.
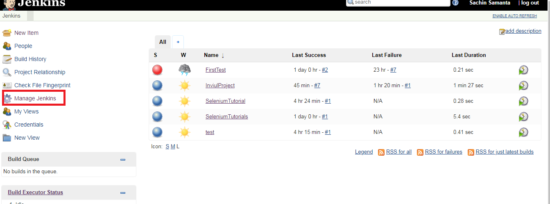
Click on manage plugins.
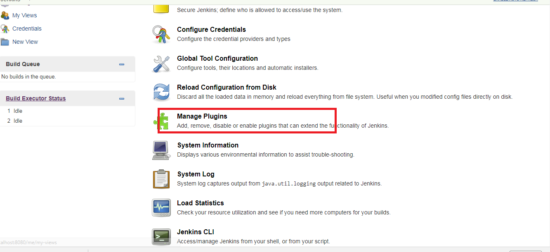
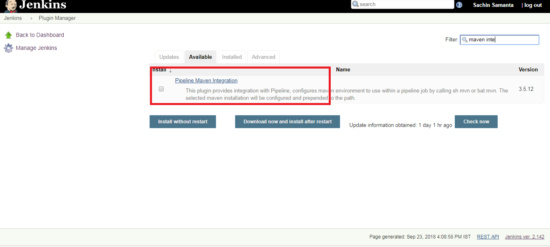
If Maven plugin is not there in the installed list then search for the maven from the Available section. Further, wait for the plugin to get installed in Jenkins.
Now it will prompt you to restart your Jenkins server, hence you can proceed to do that.
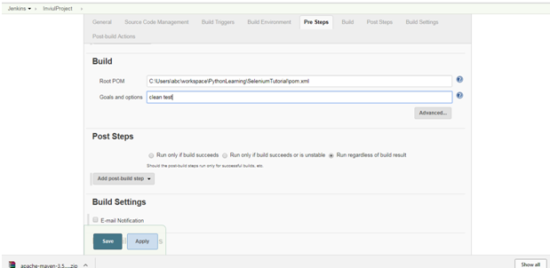
Now create your first job to trigger build from Jenkins. Scroll down further until you get build section.
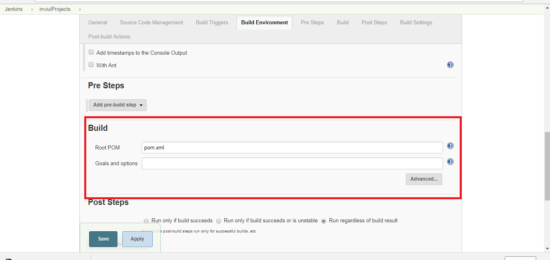
Enter the path to your pom.xml as the value in the Root POM text area, and enter clean test in Goals and Options text area. See the image below.
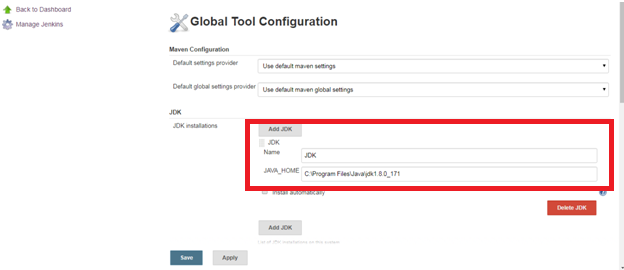
If you get an error as shown in the below screenshot then click on the tool configuration link and proceed as per the below steps:

Step# 1: Enter the java_home
Step# 2: Click on add maven and enter the maven name and maven home
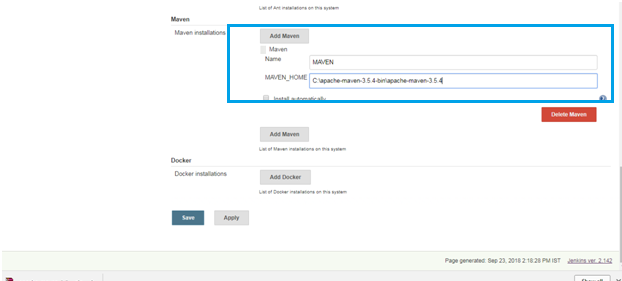
Now your maven is set and you can continue to further configurations.
How to set up periodic builds in Jenkins?
If you want to run your build for specific time interval then go to build triggers and select build periodically by entering the job pattern.
Click on apply and save
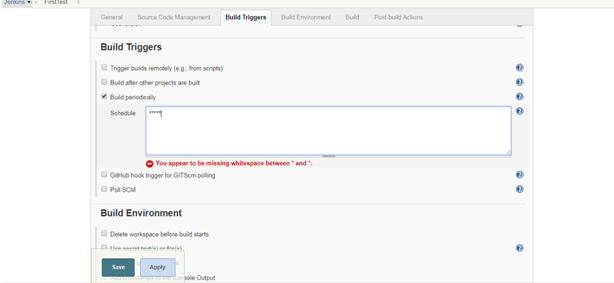
I entered * * * * * which means it will run my job every minute
Explanations of above build logic/pattern
Let’s say we assign each star some numeric position (first, second,..) for our convenience to explain this logic So here the first star denotes minute whose range is between 0 to 59. Similarly, the second star denotes hour with range from 0 to 23, the third star denotes the day of the month which lies between 1 to 31, fourth star means that the month whose range lies between 1 to 12 and the fifth the last star denotes day of the week whose range is between 0 to 6 (Sunday to Saturday).
How to configure email in Jenkins build?
If you want to send email after the build based on the build status then you can add email of the recipients.

Now click on apply and save.
Job Created Successfully:
You get your job successfully done.
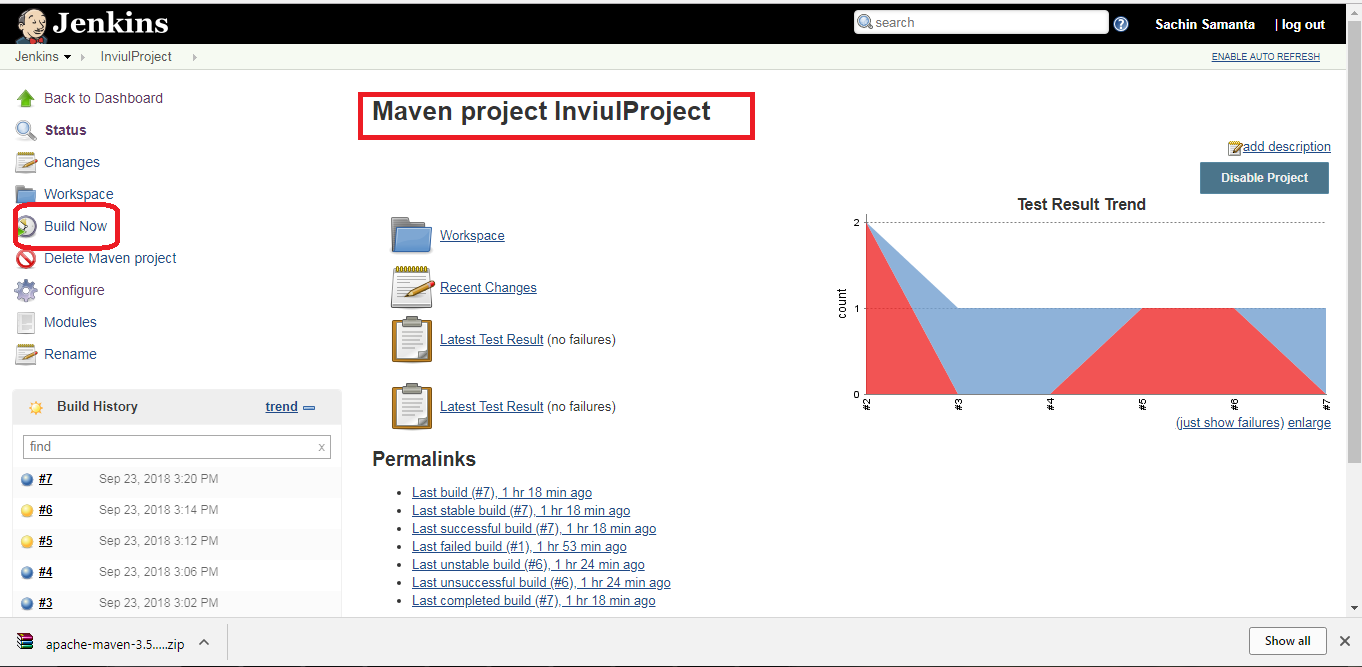
Click on “build now” from the left pane.
Your build starts running.
I have created a simple project which will validate the title of Google homepage
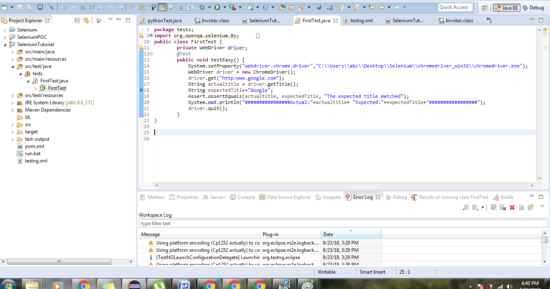
Here is the above code, if you wish to use it:
package tests;

import org.openqa.selenium.WebDriver;
import org.openqa.selenium.chrome.ChromeDriver;
import org.testng.Assert;
import org.testng.annotations.Test;

public class FirstTest {
	 private WebDriver driver;
		@Test
		public void testEasy() {
			System.setProperty("webdriver.chrome.driver","C:\\Users\\abc\\Desktop\\Selenium\\chromedriver_win32\\chromedriver.exe");
			WebDriver driver = new ChromeDriver();
			driver.get("http:www.google.com");
			String actualtitle = driver.getTitle();
			String expectedTitle="Google";
			Assert.assertEquals(actualtitle, expectedTitle, "The expected title matched");
			System.out.println("################Actual:"+actualtitle+ "Expected:"+expectedTitle+"#################");
			driver.close();
  driver.quit();
		}
}
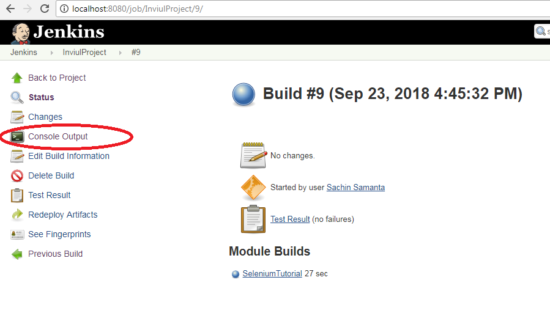
Click on Console Output to see the results of the build and test as well.
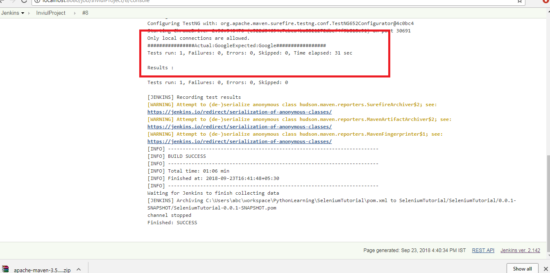
Here is the result.
Hope you liked this thorough step by step guide to set up and configure your Selenium Maven project with CI tool. If you liked this tutorial and spread the knowledge among your friends because Learning is Sharing. You can share your queries, doubts, and feedback in the comment below. You can also join our Facebook group for latest updates on Selenium and Automation testing. We are sharing lots of cool stuff and knowledge over there.
If you also want to share awesome tutorial like this then get in touch with us; Also, you can come up with your ideas.
Join Our FacebookGroup


