In the previous tutorial, we discussed the introduction to Appium and its architecture. Today we are going to discuss the guide to Install Appium in your machine so that you could start with the mobile automation. Let me reveal one secret with you. If you Install Appium server successfully in your machine then further testing processes will not take much time, which simply means that test engineers initially gets trouble in setting up appium server. In this tutorial, I am going to tell you the easiest ways to Install Appium in your windows system.
Before we begin setting up the server you have to furnish all the pre-requisites required. So here is the list of those pre-requisites.
Pre-Requisites before setting up the Appium server
- Install JDK in your system (Download JDK from here)
- Set Up Environment variables (Click on the link for Environment variable setup guide)
- Set up Selenium WebDriver (Click on the link for first step guide to Selenium)
Above three are the pre-requisites for installing Appium server in your system. Let’s begin the steps which guide you through the installation processes.
Step# 1: Install Android SDK
Android SDK contains different folders like SDK, platform-tools, tool, etc. If you take singleton step then you have to download each folder separately and have to put at one place.
I know it is a cumbersome process. So to avoid that, we just need to download one application.
The magical application is- Android Studio. It comes with everything which we needed to perform test automation on Android devices. Let’s begin!
Select package of your choice based on the OS you have, see image below:
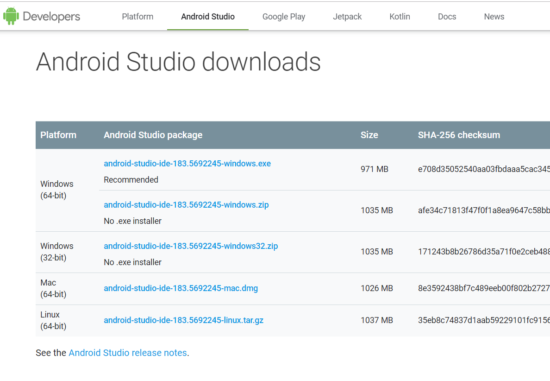
Once download, click install and complete the installation process. The installation step is same as installing Eclipse or IntelliJ IDEA.
Step# 2: Verify Android SDK folder
Launch the Android Studio which you installed as per Step# 1.
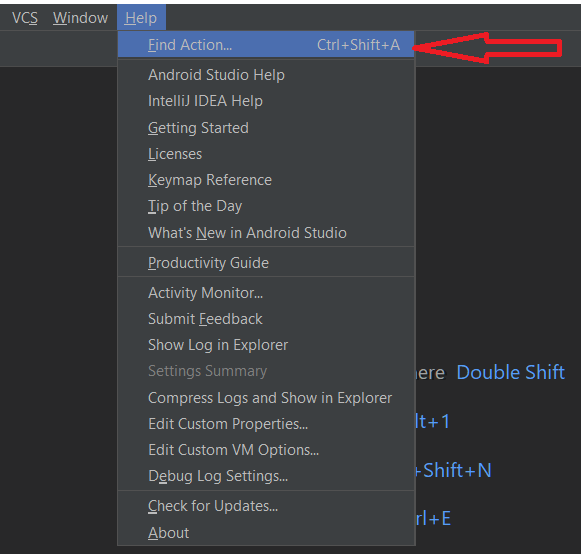
Go to Help Menu and Click on Find Action, or press Shift bar twice.
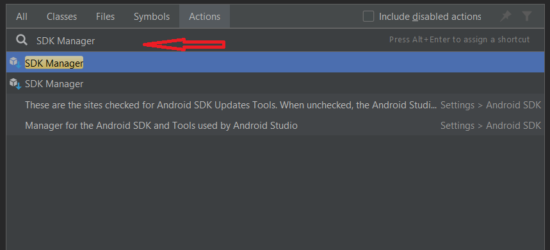
Next, type SDK Manager in the search text area. Click on the top search suggestion.
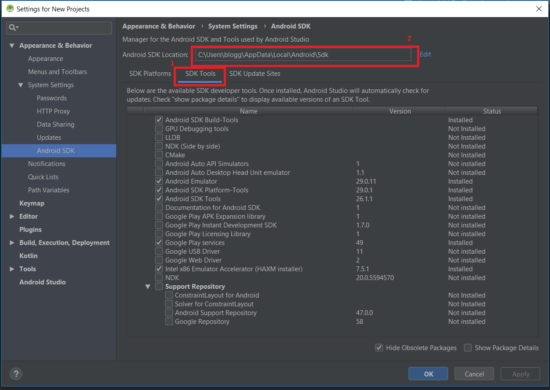
Click on SDK Tools tab and copy the SDK path given under Android SDK Location.
Eg: C:\Users\blogg\AppData\Local\Android\Sdk
Go to Android SDK Location’s path and verify whether folders are available as per below screenshot.
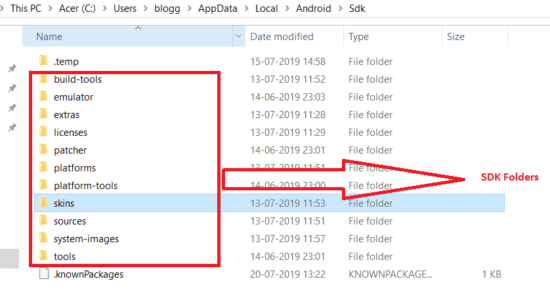
These are the ‘must-have’ folders for your mobile automation.
Don’t worry, if you don’t get above folders. Go back to SDK Tools tab inside SDK manager and check below options then click OK. Those folders will be installed in your system.
Options to be checked are:
- Android SDK Build-Tools
- Android Emulator
- Android SDK-Platform Tools
- Android SDK Tools
- Google Play Services
- Intel x86 Emulator Accelerator
You can choose an Android version from SDK Platforms Tab.
Step# 3: Set Environment variables for Android SDK
We need to set up environment variables whenever we are going to make changes at the system’s environments, so here are we are going to follow the same process.
Create a new System variable as ANDROID_HOME and give the path to the Android SDK location folder.

Next, in Path options add the path to platform-tools and tools folders.
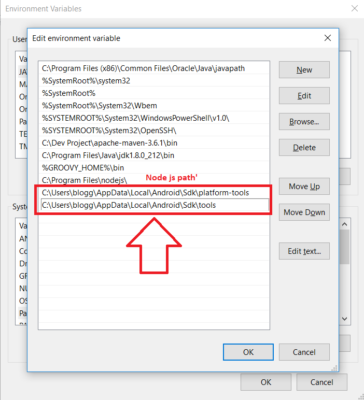
Validate SDK Installation
Go to command prompt and type following commands to validate SDK installation:
- adb – -version
- where adb

Step# 4: Install Node.js
Node.js is the language of Appium server. Hence, Appium works by using both HTTP protocol and Node.js; therefore, we can say that Appium is itself a Node.js server.
We need to install node.js in our system to install & trigger appium.
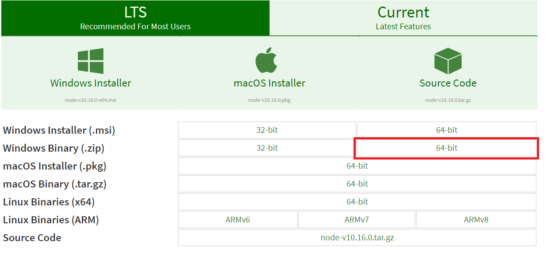
Once downloaded the file then install it in your machine.
Step# 5: Validate Node.js and node package manager (npm) installation
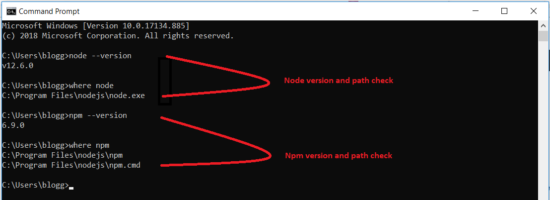
Go to command prompt and type node – -version to validate the node.js installation. You can even validate the path where node.js installed. Use command-
where node
Node Package Manager (npm) manages different modules in an appropriate place so that the node could find them. It intelligently resolves the conflicts. Read more here…
Npm comes handy with node.js. So in parallel, we can validate npm installation as well.
Version command: npm – -version
Path command: where npm
Step# 1 to Step# 5 is the background work for Appium installation. Now you have two choices to install appium (you can pick any one of them), those are-
- Install Appium with Node.js
- Appium installation through Appium desktop client
Let’s discuss both the ways.
How to install Appium with Node.js?
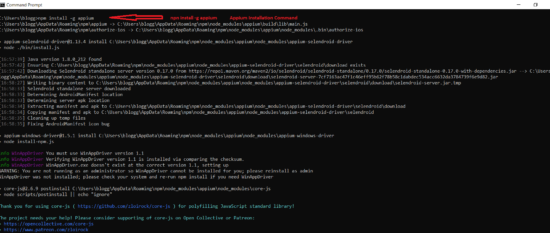
Installing Appium through npm command is very easy. You just have to use the following command to install Appium with node.js:
npm install -g appium
Validate Appium installation
We can follow the same process as above to check whether Appium installed successfully or not.
Use the following commands:
- appium –v
- where appium

How to start the Appium server from the command line?
Go to the command line (Window+R) and use the command- appium, to start the appium server.

How to stop Appium server from the command line?
Press Ctrl+C to terminate the Appium server.

How to uninstall Appium with node.js?
If you wish to uninstall Appium with node.js, then simply replace install keyword by uninstall in above installation command, Appium will be uninstalled successfully.
npm uninstall -g appium

We have finished the Appium installation process through Node.js. Let’s look at the process to install Appium through Appium desktop client.
How to install Appium through Appium Desktop client?
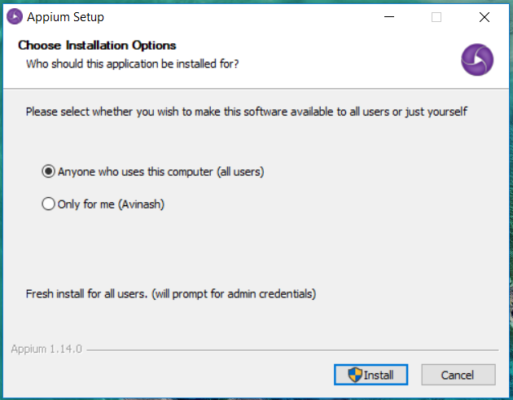
Select the latest release and download the .exe file for your operating system and run the executable file. Follow the below steps to install the Appium desktop client.
Step# 1: Click Install
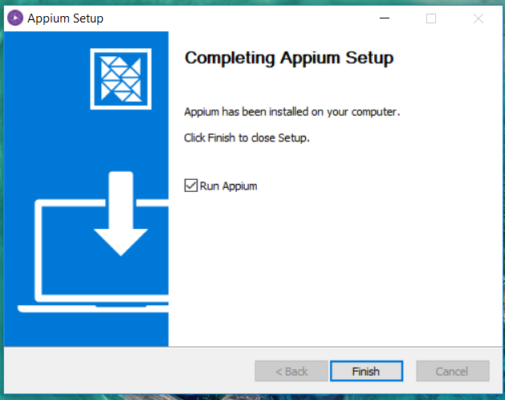
Step# 2: Click Finish
How to start Appium server from Appium Desktop Client?
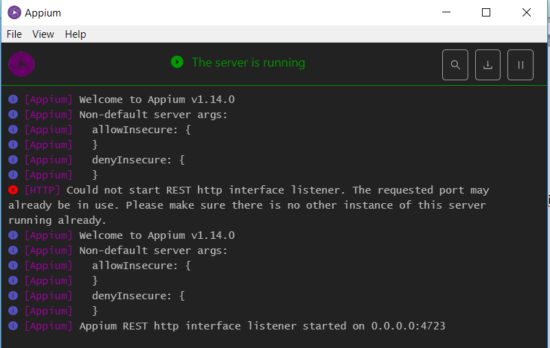
Open Appium desktop client and click on Start Server button.
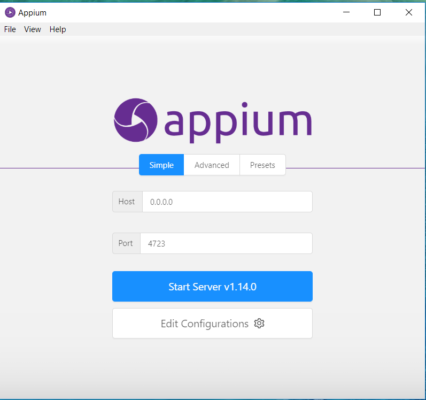
A new window appears with all the logs of activities done in association with the server.
This was all about a holistic approach to install appium in your machine to work on mobile testing. Stay glued for more hot tutorials on Appium.


