In the previous tutorial, we discussed GitHub repository creation and integration with Eclipse for code commit and merge. Today we will take it to the next level hence we are going to discuss GitHub repository integration with Jenkins. In daily life we call it CICD configuration, but, CICD is more like the creation of pipelines by following DevOps culture of Software development and deployment.
When we integrate our source code with Jenkins then we run our tests without any IDE and we trigger build and determine successful test execution based on the successful build.
Pre-Requisites to configure GitHub repository with Jenkins
You must know how to install Jenkins and technique to configure simple Maven project in Jenkins. Click on below link to successfully setup Jenkins.
Once you installed Jenkins, then install git binaries. Click here to download Git binaries. See image below.
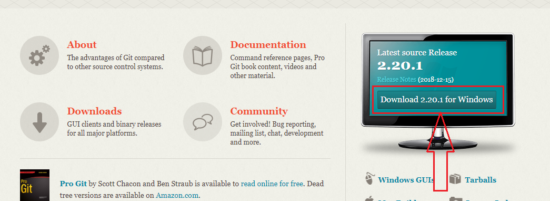
Let’s follow the steps to install Git binaries and GitHub repository integration with Jenkins.
How to install Git Binaries?
Below steps guides you through the installation of Git binaries.
Step# 1: Open Installation File
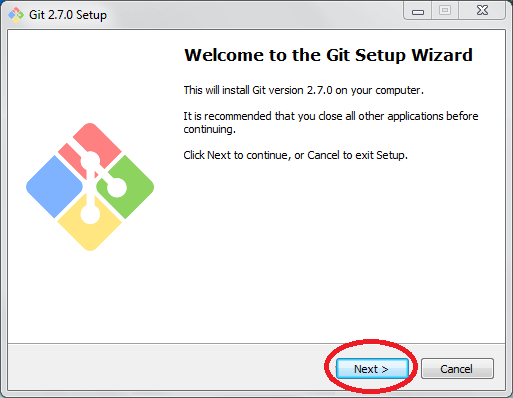
Open installation file and Click next on Git setup wizard.
Step# 2: GNU Public License
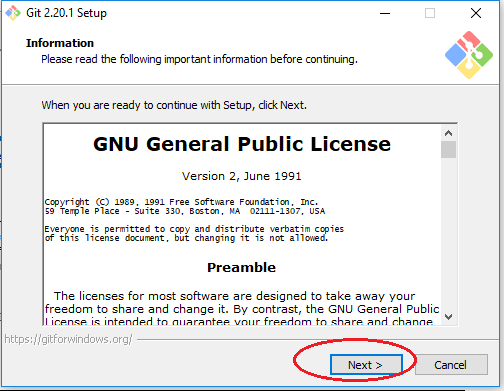
Read GNU license and proceed Next.
Step# 3: Select Destination
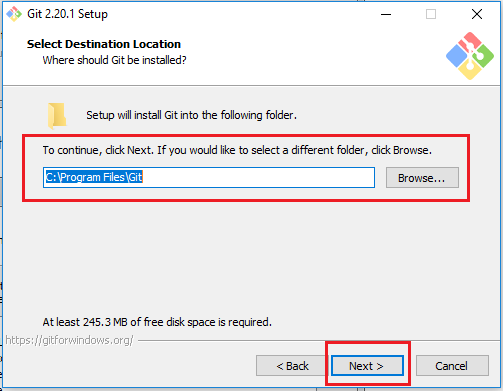
Give destination path to store the files and folder of Git binaries.
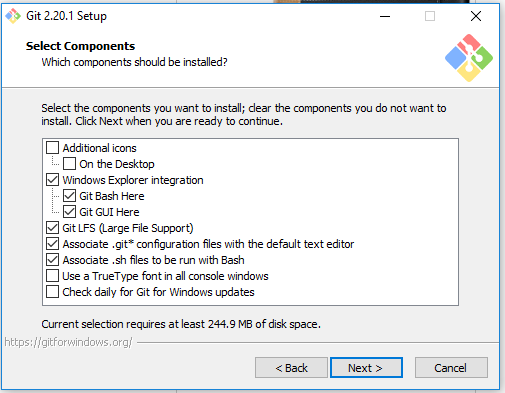
Step# 4: Select Components
If the selection is default as shown in the image, then OK.
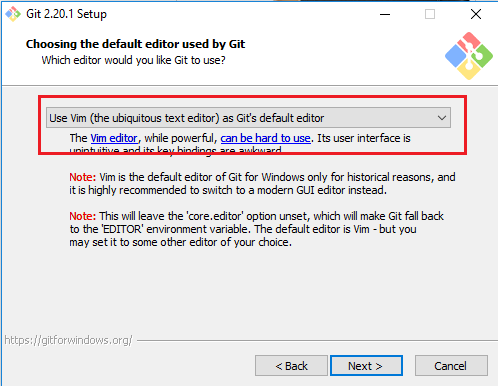
Step# 5: Default Editor
Set setting as per below image to set the default Git editor.
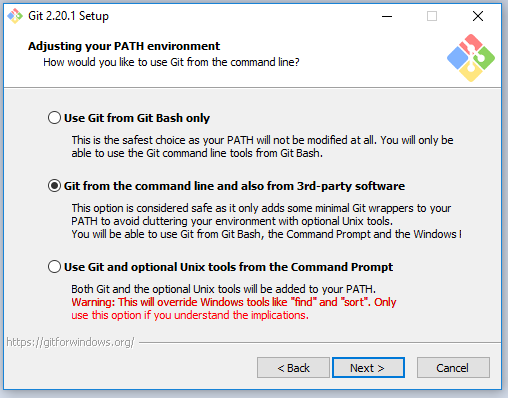
Step# 6: Git path
You will get Start menu folder selection option click next and select Git path option as per below image.
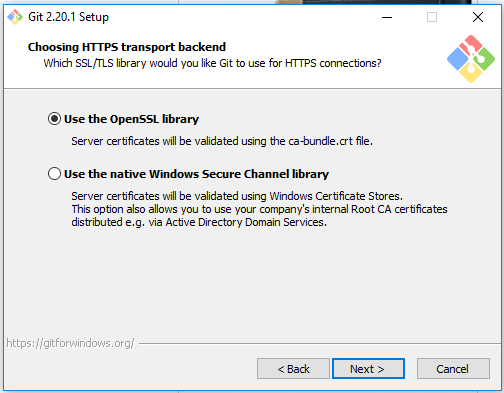
Step# 7: SSH & SSL settings
Select Use Open SSH option if it prompts of choosing the SSH executable. Select SSL Transport as per image below.
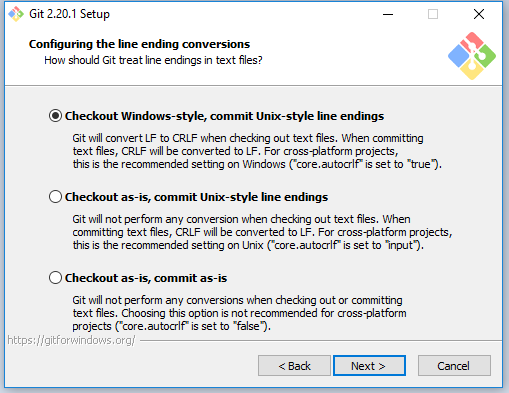
Step# 8: Line encoding selection
Configure Line encoding selection as per below image then click Next.
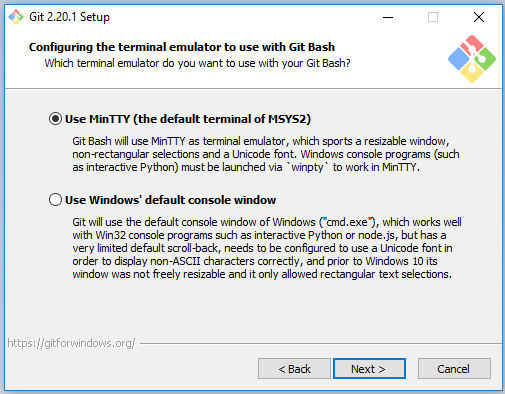
Step# 9: Configure Terminal Emulator
Select Terminal Emulator as per below image.
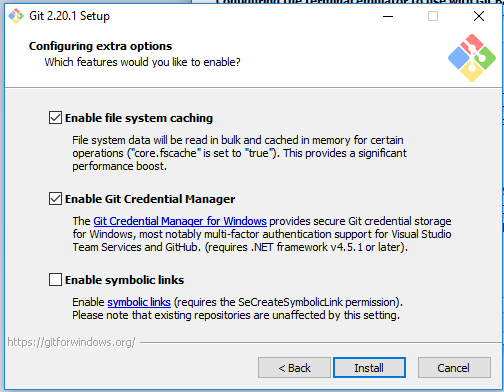
Step# 10: Configure Extra option
If it prompts about the extra option, then select as per below image then click Next. Now onwards installation will start.
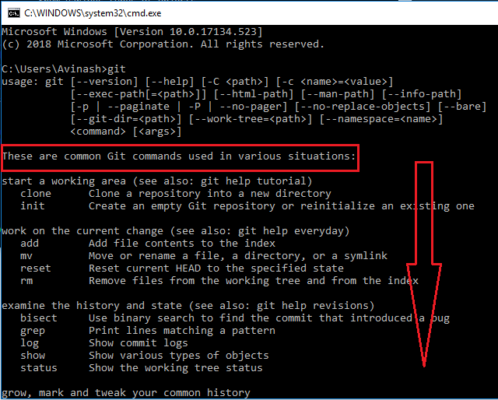
Once it is completely installed then check it by executing git command on command prompt.
Why do we install Git binaries?
Jenkins runs Git commands via Git executable files so we set the path of Git executable at Jenkins server to run tests stored at GitHub repository.
How to configure Jenkins with GitHub repository?
Now we will learn to configure the GitHub repository with Jenkins. Just follow the below steps and your Jenkins will be ready to trigger build for your code stored at GitHub repository. Here we will use the same repository which we have created in our previous article.
Step# 1: Go to Manage Plugin
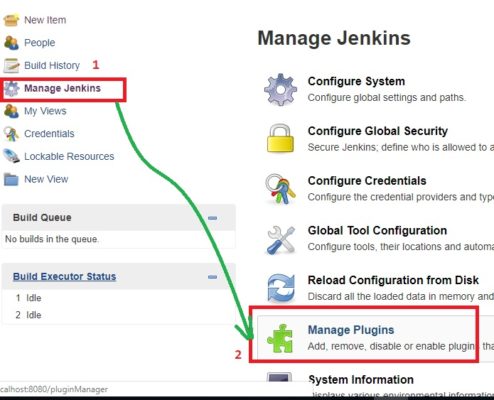
Step# 2: Check GitHub Plugin
Go to Installed option and look for GitHub Plugin. If it is not installed, then click on Available option then search plugin and install it. See image below:
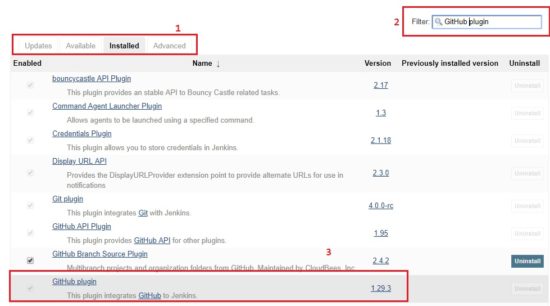
Step# 3: Configure GitHub Server
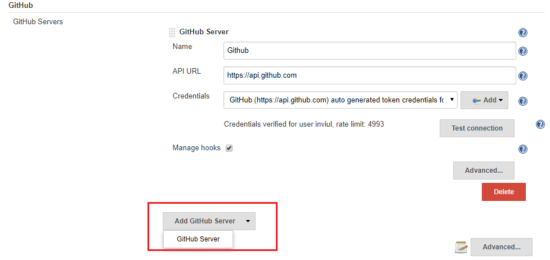
Go Manage Jenkins and Click on Configure System Then scroll down and go to GitHub Servers option. Click on Advanced option then you see Override Hook URL, Shared secret and Additional actions options. Click on Additional actions and Select convert login and password to the token. See image below:

Step# 4: Create Token
Select Login and password option and enter your GitHub’s user name and password then click on create token credentials.

Step# 5: Select Token and Test GitHub Server
Scroll up and stop at GitHub server option. Click on Credentials dropdown and select GitHub token which you have configured above. See image below.
Step# 6: Get the git.exe path
Go to the folder where you installed Git binaries. Look for cmd folder inside Git folder. Copy path of the git.exe file. See image below.

Step# 7: Set git.exe path in Jenkins
Go to Manage Jenkins again and Open Global tool configuration. Look for Git option. Here give the above copied path of git executable. See image below:
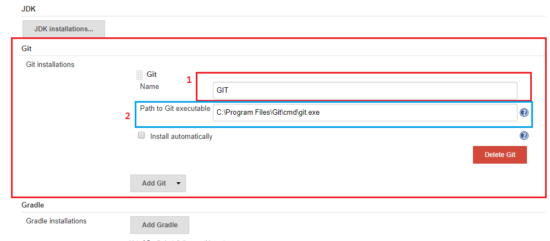
At Global tool configuration, you must set the path of Maven and JDK too. See Jenkins installation tutorial.
How to create New Maven in Jenkins for GitHub repository?
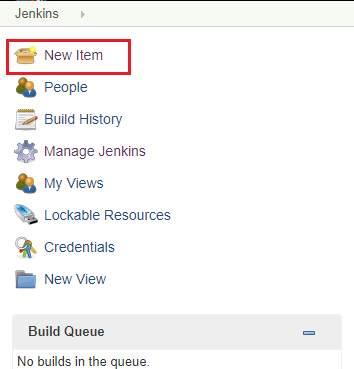
Step# 1: Create New Item
Go to New Item.
Step# 2: Create a new Maven project
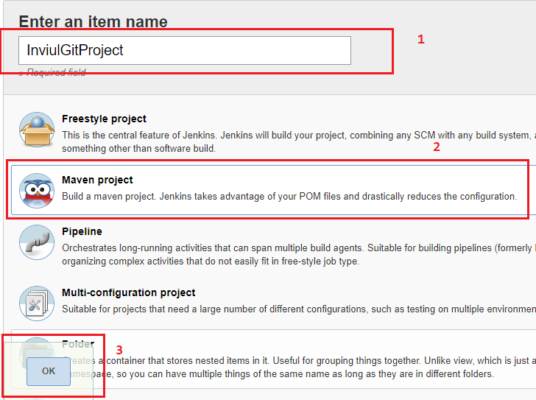
Given new item name, Select Maven project then click OK. If you don’t find the Maven project option, then install the Maven Integration plugin.
Step# 3: Configure Project- Source Code Management
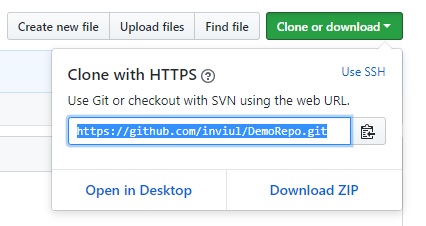
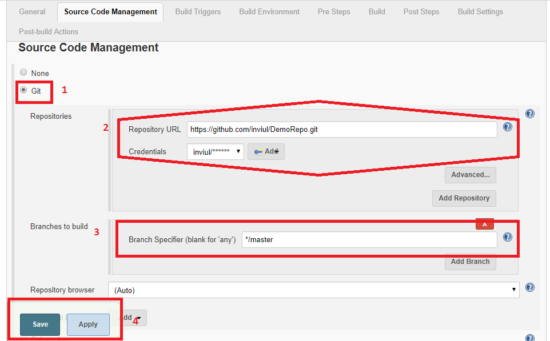
Now project configure dashboard will be opened. Go to Source Code management and Select Git and enter the path of the GitHub Repository. You can get it from the clone button at GitHub. See image below.
Step# 4: Configure the pom.xml path
This is a maven project, so you need to configure pom.xml. Go to Build option and give the path of pom.xml as per below image.

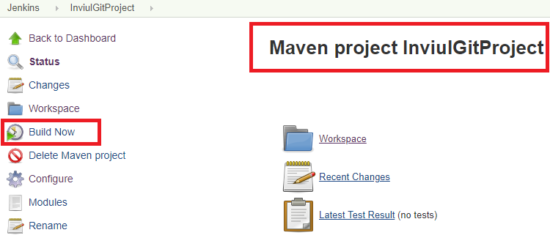
Step: 5: Build Now
Now build your project by clicking build now button.
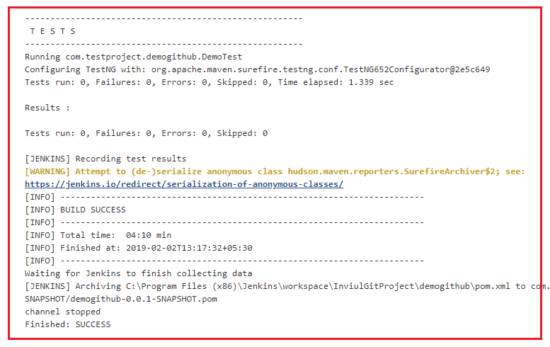
Console Output
Click on Console output and see the test and build result at Jenkins dashboard.
This was all about configuration of GitHub repository with Jenkins. Drop your queries in the comment form below and don’t miss to join our Facebook group for quick updates.


