This is one of the most important tutorials with respect to designing data-driven framework in the Selenium project. The combination of @Factory annotation and @DataProvider annotation helps in many ways to set the value of the instance variables. Thus, today’s agenda is about uses of @Factory in our Selenium project.
I have suggestions for some of the tutorials here which will help you in improving the strength of your knowledge bank:
- @DataProvider annotation for data-driven test design
- @Parameters for passing test value to the test cases
- Parsing JSON file for test data management
- Reading data from excel sheet
- Storing data from excel sheet to the hash map
- How to retry failed tests in Selenium?
- What is TestNG Listener?
These are some of the tutorials which will refresh your knowledge on parameterization through Excel sheet, JSON file, @DataProvider annotation, and @Parameters annotation.

What is the @Factory annotation in TestNG?
TestNG @Factory annotation is like any other annotation in TestNG. We need to import the following package and file before we implement this annotation in our project.
import org.testng.annotations.Factory;
@Factory basically runs multiple classes from a single class and return type of its method is 1D Object array.
Let’s look into the implementation of @Factory in Selenium project
How to run multiple classes from a single class using @Factory annotation?
If you want to handle multiple test cases (as the class definition in Java) from one class, then @Factory annotation helps you to do so. Let’s follow the steps below to run multiple classes from a single class.
Step# 1: Create multiple test classes
This is the first step where we have to create test classes to define the testable methods. So, at first, I created two test classes. Here are they:
TestCase1.java
package Test;

import org.testng.annotations.Test;

public class TestCase1 {

  @Test
  public void testMethod1() {
	  System.out.println("This is test method 1");
  }
}
TestCase2.java
package Test;

import org.testng.annotations.Test;

public class TestCase2 {

	 @Test
	  public void testMethod2() {
		  System.out.println("This is test method 2");
	  }
}
Step# 2: Create a single class with a @Factory annotation to trigger other classes
Now create a class which will control other test classes through @Factory annotation. The methods written inside @Factory has 1-D Object array as its return type. Here is the implementation.
TestNGFactoryClass.java
package Test;

import org.testng.annotations.Factory;

public class TestNGFactoryClass {


	@Factory()
	public Object[] getTestCaseClasses(){
		Object[] testObject = new Object[2];
		testObject[0] = new TestCase1();
		testObject[1] = new TestCase2();

		return testObject;
	}


}
testng.xml file
<?xml version="1.0" encoding="UTF-8"?>
<!DOCTYPE suite SYSTEM "http://testng.org/testng-1.0.dtd">
<suite name="Suite">
  <test thread-count="2" name="Test" >
    <classes>
      <class name="Test.TestNGFactoryClass"/>
    </classes>
  </test> <!-- Test -->
</suite> <!-- Suite -->
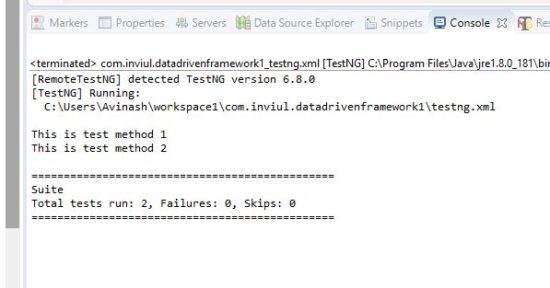
Console Output

This was all about running multiple test classes from a single class using @Factory. Now coming to the implementation of @Factory and @DataProvider altogether.
How to use TestNG @Factory with @DataProvider annotation?
You can say that we can build multiple classes together, so what’s the benefit of using @Factory in our project. The real benefit of using @Factory annotation is visible with @DataProvider annotation when the constructor has some arguments and you need to set the value of those arguments.
Follow the steps below to pass the value to the test constructor using @Factory annotation and @DataProvider annotation.
Step# 1: Create a test class with a constructor having arguments
TestCaseWithConstructor.java
package Test;

import org.testng.annotations.Test;

public class TestCaseWithConstructor {

	private String str;

	public TestCaseWithConstructor(String st){
		this.str = st;
	}

	 @Test
	  public void testMethod() {
		  System.out.println("This is test method and value of str is- "+str);
	  }
}
Step# 2: Create a class which will send the value to the constructor using @Factory annotation and @DataProvider annotation
FactoryAndDataProvider.java
package Test;

import org.testng.annotations.DataProvider;
import org.testng.annotations.Factory;

public class FactoryAndDataProvider {


	@Factory(dataProvider="dataProvider")
	public Object[] setConstructorValue(String s){
		return new Object[]{new TestCaseWithConstructor(s)};

	}


  @DataProvider(name="dataProvider")
  public Object[][] dp() {
    return new Object[][] {
      new Object[] { "Test Data1"}
    };
  }
}
testng.xml file
<?xml version="1.0" encoding="UTF-8"?>
<!DOCTYPE suite SYSTEM "http://testng.org/testng-1.0.dtd">
<suite name="Suite">
  <test thread-count="2" name="Test" >
    <classes>
      <class name="Test.FactoryAndDataProvider"/>
    </classes>
  </test> <!-- Test -->
</suite> <!-- Suite -->
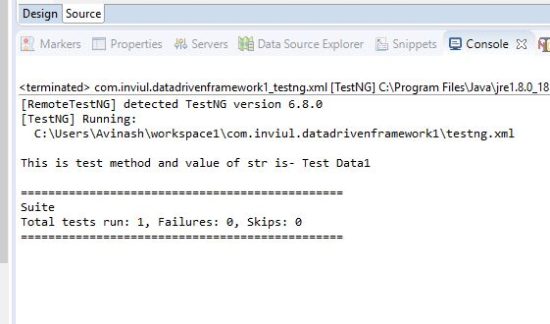
Console Output

This is all about uses of TestNG @Factory annotation in Selenium project. Feel free to raise your questions and don’t miss to join our Facebook group.


