In previous Appium tutorials, we have seen the configuration of Emulator for performing Appium testing. The next question would be how shall we send our test to mobile devices? Well, for that we need to configure Appium in IDE (Eclipse or IntelliJ) along with Selenium, TestNG and Maven.
You got the clue, Right?
It should be well understood to you, if we talk about Eclipse or any other IDE then there must be the inclusion of Jar file or Eclipse plugin or dependency resolution. Yes, here we will configure Appium in Eclipse either through Maven dependency resolution via pom.xml or by importing jar file of appium java client into our project. You can pick whichever method suits best for your project.
Recommended: Easy way to get Android App Package and Android App Activity for native app testing
Pre-Requisites for configuring Appium in Eclipse
- Enable Android emulator for AVD app testing
- Enable Developer’s mode (USB debugging) for testing on physical devices
- Create a Maven project [Optional]
- Configure your project with Java WebDriver client
- Install TestNG in Eclipse
Earlier we have already discussed most of the pre-requisites in a separate article, except on enabling developer’s mode on Android devices. We will discuss it in next sub-section.
How to enable USB debugging through Developer’s mode in Android devices?
Follow the steps below to enable USB debugging in your physical Android’s device:
- Go to Settings
- Tap ‘About Phone’ option
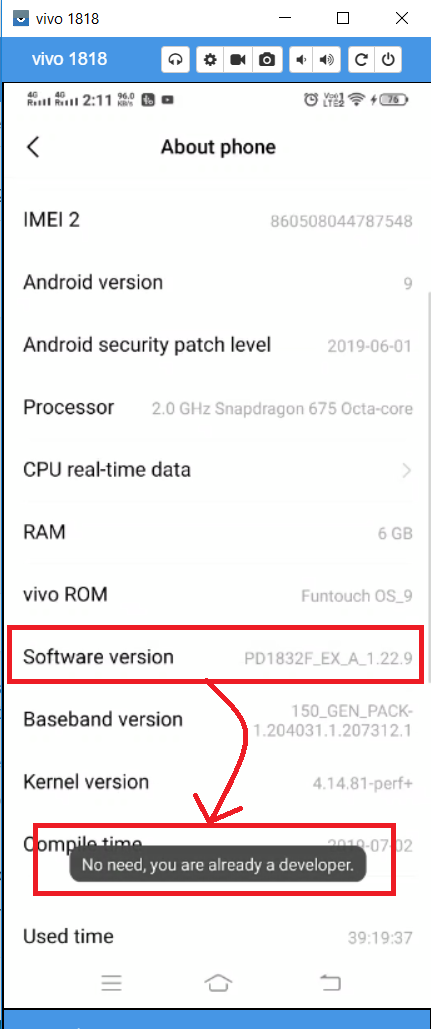
- Tap 7 times at Build number or Software version (different naming in different phones). If it’s already enabled in your phone then you will get a notification as per picture below, otherwise, you will get a confirmation message that you’re now a Developer!
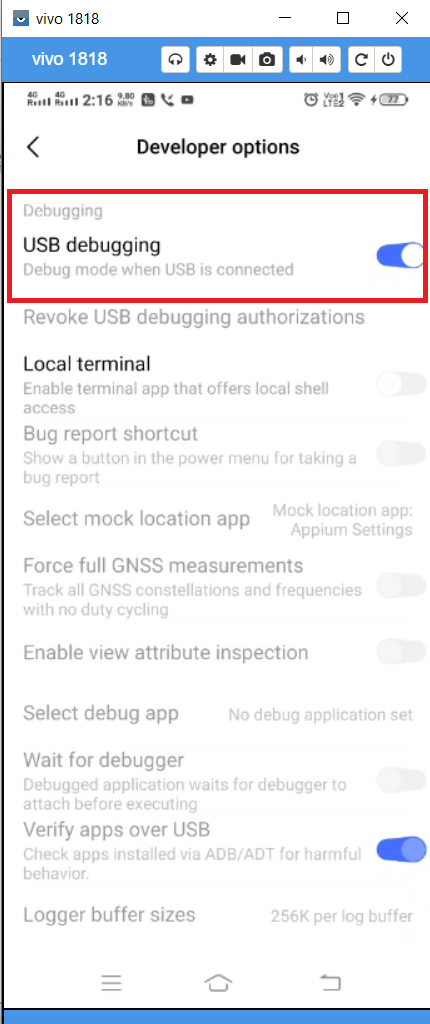
- Go back and Tab Developer Option and Make sure USB Debugging is enabled
After enabling USB debugging, your physical device is ready to accept the test commands. Before that let’s validate active devices available for testing. For this, We use adb devices command on the command line.
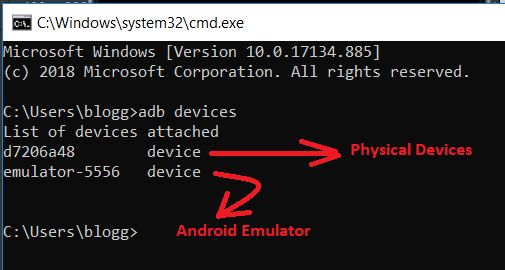
In the above image, it’s seen that there are currently two active devices available to perform mobile testing with Appium. We can differentiate them by their uid (unique device id).
How to configure Appium with Jar file in Eclipse?
AppiumDriver is an interface which provides all the implemented methods through AndroidDeriver and iOSDriver. As its name depicts, AndroidDriver will be further instantiated to perform the testing operation on Android devices, whereas, iOSDriver used to perform testing operations on iOS devices. So AppiumDriver has a separate class for each test devices. This is because Android and iOS have the different architecture to interact with Appium server.
We use Appium Java Client jar file to implement AndroidDriver. Its implementation is the same as WebDriver. We just need to import Java client for Appium in our project.
On clicking above link you land to the main repository of Appium java client where you see a list of all the versions. Click and choose the best compatible version with respect to other Jar files in your project.
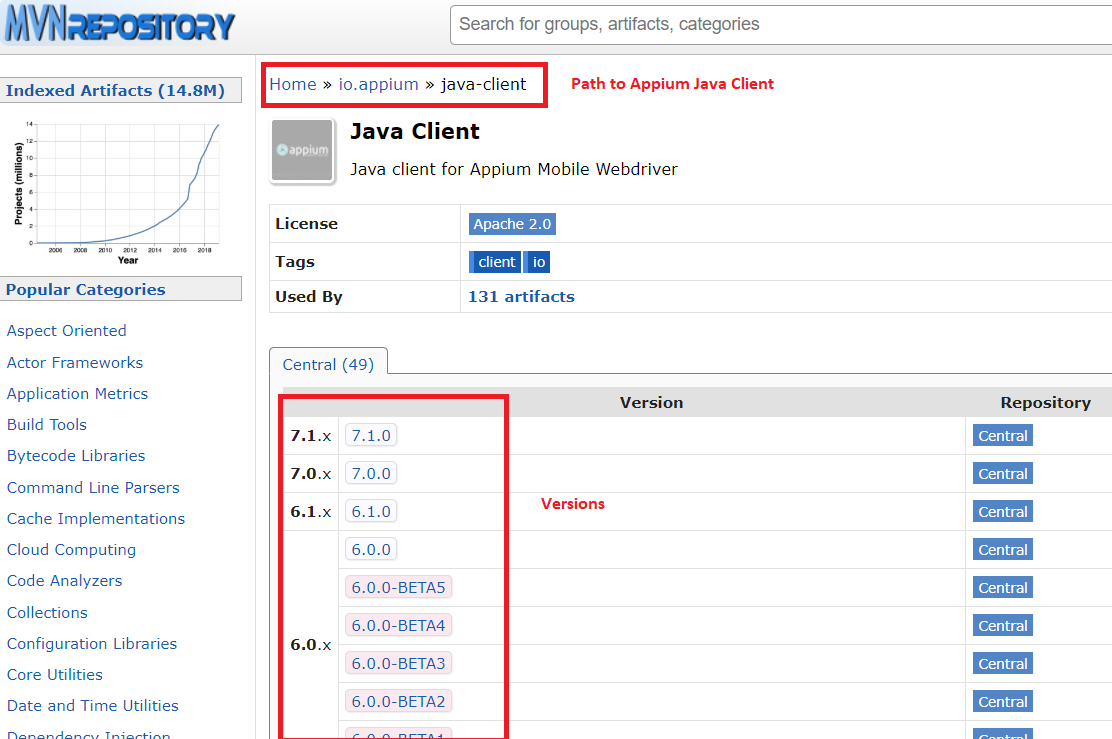
Suppose we need appium-java-client-7-1 so we click on 7.1 version and it lands us to the main page. See image below:
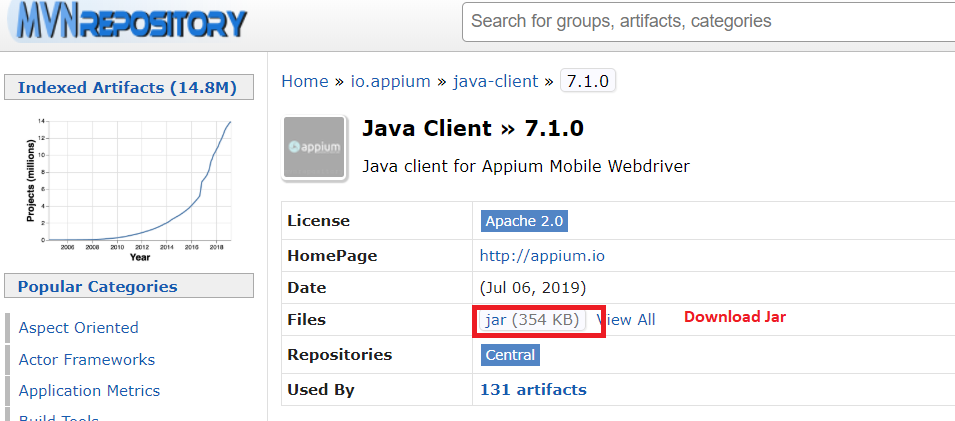
Click on jar link for downloading Appium java client v7.1.
Further, go to Configure Build Path option in your project and import the Java client jar file. This will finally configure Appium in your project with java client jar file.
How to configure Appium in pom.xml?
If you have a Maven project then you must be familiar with pom.xml file. Here you just need to add the dependency of Appium java client and Maven will automatically resolve the dependencies.
Here is the dependency’s declaration of Appium Java client. You can get this declaration from above jar download link as well.
<dependency>
    <groupId>io.appium</groupId>
    <artifactId>java-client</artifactId>
    <version>7.1.0</version>
</dependency>
This tutorial will be a milestone if you want to configure Appium in your automation framework. In the next tutorial, we will discuss the sample program to create an Appium test.


