We have discussed the installation of Appium server in our last article. Hope you have done it properly without any trouble. Well, if it comes to Mobile testing then there is an importance of emulators; therefore, our agenda of this tutorial is about discussing all the depths knowledge of Android Emulator and technique to configure them with our Appium project.
Let’s begin!
What is Android Emulator?
An Android Emulator is the Android Virtual Device (AVD) which has a close resemblance to Android physical devices. It acts as the target to perform mobile test automation.
Some of the Android Emulators are as follows:
- Genymotion
- Android Studio AVD
- MEmu
- BlueStacks
- Nox Player
- LeapDroid
- KoPlayer
- ARChon
- Bliss
- Droid4X
- PrimeOS
- Remix OS Player
- Xamarin
- YouWave
Mostly Android emulators in the above list are freeware, means you don’t need to pay a single penny to use them.
In this tutorial, we are going to discuss the creation of Android Emulator with Android Studio. If you have gone through the previous article on Appium installation, we also discussed the installation of the SDK manager along with few folders. In that installation, we have already installed the Emulator.
If you want to recall then click on the below link and go to Step# 2.
Let’s learn to create an Android Emulator with Android Studio.
How to create Android Emulator with Android Studio?
Follow the steps and create a new Emulator.
Step# 1: Launch Android Studio
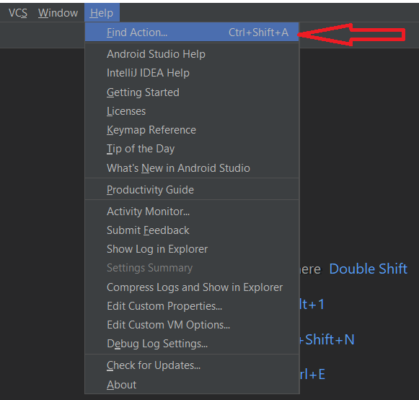
After launching the android studio, Press Shift key twice or Go to help and click on Find Action.
Step# 2: Open AVD Manager
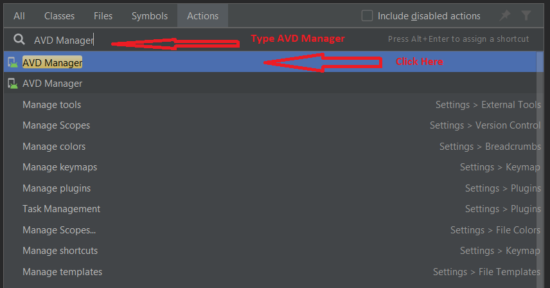
Type AVD Manager in the search area. Click on the first search suggestion.
Step# 3: Create New Virtual Device
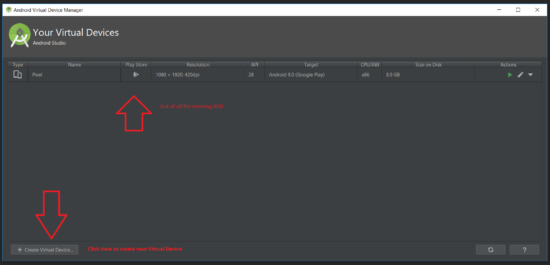
AVD Manager Window opens up. Here you see list of active AVDs as Emulators. Go to the bottom left and click on +Create Virtual Device button to create a new Android Emulator.
Step# 4: Select Hardware
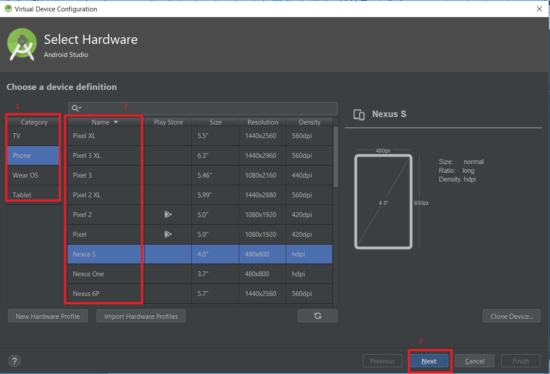
Now choose the category of hardware then select device models and finally click Next button.
Step# 5: Android Platform Selection
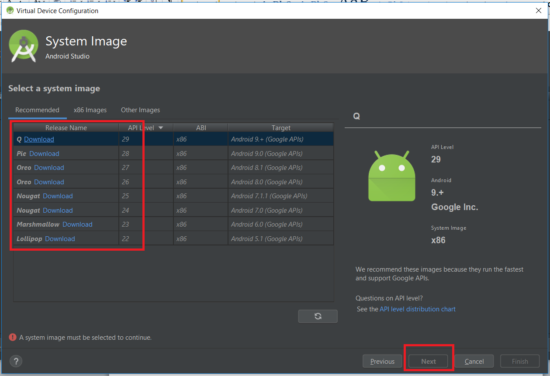
Go to Recommended tab and Select the Android version. Wait for the file to get downloaded, and then click the Next button.
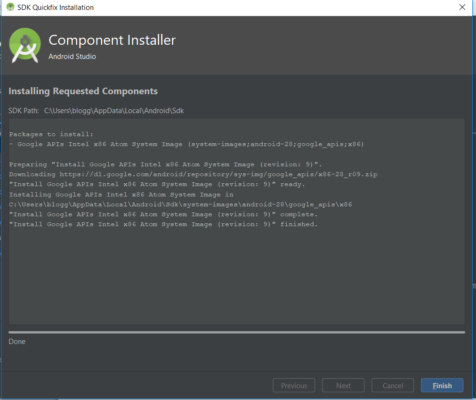
After download Click Finish
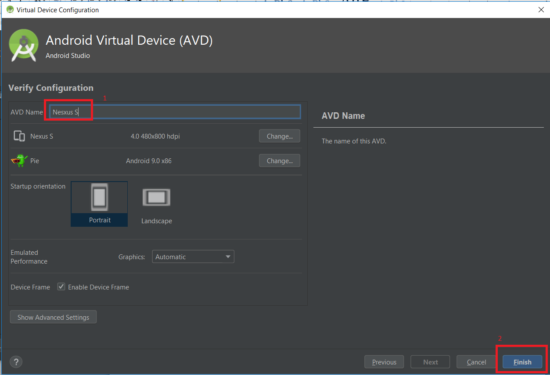
Step# 6: Give AVD Name
Select installed OS and click Next. You will be redirected to a screen where you give AVD name then click Finish.
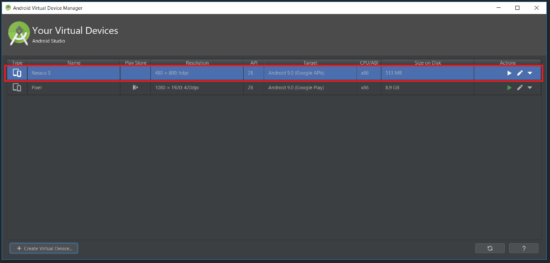
It will be redirected to the AVD Manager window and your new devices will be added in the list.
How to start Android Emulator from AVD Manager?
If you refer above image then go to Actions column at the list and click on the first play button. Your Emulator will be started.

How to validate Active devices?
Now you can validate the total number of active devices which includes physical as well as android emulators through ADB commands via command prompt.
Command: adb devices

In the above image, the first device is the physical device whereas the second device is our active Android emulator.
This was all about Android Emulators. You can post your queries by using the comment form below and also join our group for quick support.


